Now that you're comfortable with the basics, explore these ways to...
- Use the right communication channel
- Learn more ways to manage your email
- Customize calendar events for work or school
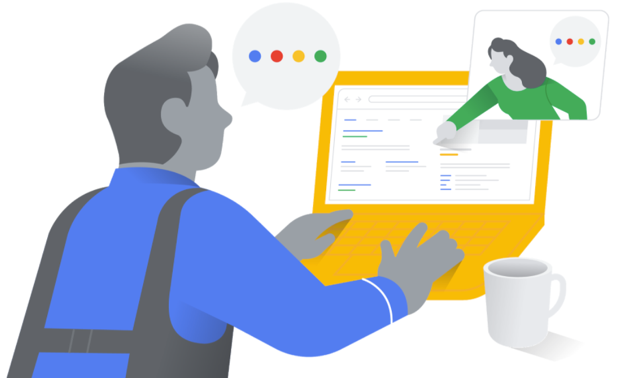
These instructions are for desktop only.
Use the right communication channel
Choose the right communication channel for your audience and message.
Communicate with individuals:
- Direct chat message—If you have a quick or time-sensitive question, send a Google Chat message.
- Email—If you need to discuss something more complex or not time-sensitive, send an email with Gmail.
Communicate with groups of people:
- Contact group—For temporary groups, like a short-term project, team, you can create a contact group. Contact groups can be used in both emails and chats. You can't directly share your contact group with others. However, if you send an email to a Contacts group, other people can reply to everyone in your Contacts group or copy your list of addresses.
-
Groups email list—Make communication easier by creating a Google Groups email list for your team. Then, instead of emailing people individually, use the group’s email address to send status updates and share resources—such as team calendars and Drive documents—with everyone at once.
Note: If your administrator did not turn on Groups for your organization, you can use contact groups instead.
Send a direct message to someone
- Go to Google Chat or your Gmail account.
- If the name isn’t already under "Chat," click Start a chat
.
- Enter a name or email address. Suggestions appear as you enter text.
- To send a 1:1 message to someone outside of your organization, enter their email address.
- Click the person you want to message.
- Enter a message, then click Send
.
Start a group conversation
- Go to Google Chat or your Gmail account.
- Under "Chat," click on an existing group conversation, enter a message
click Send
- If the group conversation isn’t under "Chat,” click Start a chat
- Enter a name or email address. Suggestions appear as you enter text.
- Click Done
.
- Enter a message, then click Send
Change position of the Chat panel in Gmail
You can move the Chat panel to the right or left side of your Gmail inbox.
- On your computer, open Gmail.
- At the top right, click Settings
- At the top, click Chat and Meet.
- Next to “Chat position,” select Left side of the inbox or Right side of the inbox.
- Click Save Changes.
- On your computer, open Google Chat or Gmail.
- At the top, click your status.
- Select Do not disturb.
- To set your preferred duration, select a duration from the list or click "Until a specific time."
- Click Set.
Tip: Notifications automatically turn back on after the mute duration expires. To end mute sooner, click your status Do not disturb
Turn off Do not disturb.
- Sign in to Google Groups.
- At the top, click Create group.
-
Enter information and choose settings for the group.
- Click Create group.
- Wait a few minutes for your new group to become active before sending a message to it. Otherwise, you might get a notification that your message couldn't be delivered.
If you want to quickly contact the same group of people by email, you can create and save a contact group. Next time you want to email that set of contacts, you just enter the group name as the email recipient.
You can also create a contact group if your administrator doesn't turn on Groups for your organization.
Create a contact group
- In Gmail, click Compose.
- Click To, Cc, or Bcc.
- Find the contacts you want to add to the group and check the boxes next to their names.
- Click Manage labels
Create label.
- Enter a name for the label.
- Click Save.
- Click Insert to add the contacts to your current message.
Email a contact group
- In Gmail, click Compose.
- Next to To, enter the label name for the group.
- Compose your message and click Send.
Learn more ways to manage your email
- On your computer, go to Gmail.
- Point to the email.
- On the right, click Snooze
.
- Choose a later day and time to get the email.
Tip: To snooze multiple messages:
- Select the messages.
- At the top, click Snooze
- If you can’t find "Snooze," click More
- If you can’t find "Snooze," click More
If you're part of a Gmail conversation that's no longer relevant to you, mute the conversation. Muting keeps future responses to that thread out of your inbox so you can focus on important messages.
- On your computer, go to Gmail
.
- At the top left, click
Compose.
- Create your email.
- At the bottom left next to "Send," click the Down arrow
.
- Click Schedule send.
Note: You can have up to 100 scheduled emails.
- On your computer, go to Gmail.
- Open the conversation you want to forward.
- At the top of the conversation, click More
Forward all.
- In the To field, add recipients.
- Type any additional content for the message.
- At the bottom, click Send.
- Open Gmail .
- At the top right, click Settings
- Scroll to the Send and Archive section and select Show "Send & Archive" button in reply.
- Click Save Changes.
- Open an email you want to respond to and click Reply.
- Compose your message and click Send+
.
Customize calendar events for work or school
Important: Appointment schedules replace appointment slots. Learn more about the changes to appointment slots.
You can better manage your availability in Google Calendar with appointment scheduling.
With appointment schedules, you can:
- Create and share booking pages so people can book time with you.
- View booked appointments alongside your schedule in Calendar.
Create an appointment schedule
Important: To create an appointment schedule on a secondary calendar or add co-hosts to an appointment schedule, you need an eligible Google Workspace subscription. Learn more about premium features for appointment schedules.
- On a computer, open Google Calendar.
- At the top left, click Create
.
- Click Appointment schedule.
- Enter a title.
- The title is visible to anyone who has the link to your booking page.
- The title appears on your calendar for the schedule and incoming bookings.
- To set an appointment duration, click the down arrow
.
- Appointments must be at least 5 minutes long.
- Set the date, time, and time zone of your appointments.
- You can set up a one-time or recurring appointment schedule.
- Tip: To add multiple time slots for a single day, click Add another period to this day
.
- Choose settings for your appointment availability, such as your scheduling window or days when you won't be available. Learn about customizing your availability.
- Choose a primary or secondary calendar where you want to add your appointment schedule.
-
Tips:
-
Once you create an appointment schedule, you can't edit it to be on a different primary or secondary calendar.
-
Anyone with edit permission to a secondary or primary calendar can make changes to the schedule and view incoming bookings. Learn more about access permissions.
-
-
- Optional: To avoid conflicts for events created or accepted on primary or secondary calendars, under "Calendars," select Check calendars for availability. Then, select all calendars for which you don't want bookable times to be available during any created or accepted events.
- Important: Each appointment slot on a booking page can only be booked once even with this feature turned off.
- To add co-hosts to the appointment, enter the co-host's names or email addresses.
-
You can also add Google Groups directly.
-
- Click Next.
 .
.
Create an event from an email
- In Gmail, compose an email.
- Click More
- Add details to your new event and click Save.
See also: Tips to manage Calendar events in Gmail
- On your computer, open Google Calendar.
- In the top left, click Create
- Add the event title and any other details.
- Next to "Does not repeat," click the Down arrow
.
- Choose how often you want the event to repeat, and when you want the event that repeats to end.
- At the top right, click Save.
Calendar can create an agenda for you, or you can attach an existing agenda to your event.
Create an agenda for a new event
- On your computer, open Google Calendar.
- Create an event.
- Optional: Enter the title, time, guests, and other details.
- Click Add description or attachments
- Your meeting notes, pre-populated with event details, are attached to your event and shared with your guests, including those outside of your organization.
Create or attach an agenda to an existing event
- On your computer, open Google Calendar.
- Select an option:
- Click an event
Pre-populated meeting notes with event details are attached to your event. - Click an event
Selected meeting notes are attached to your event.
- Click an event
- Meeting notes open in a new window. On the right, click Share.
Tip: If your administrator doesn’t allow sharing Google Drive files outside of your organization, you can send Gmail attachments to external guests instead.
Create the notes and action items document
You can also:
Add comments and assign them to specific people
- In Docs, Sheets, or Slides, select the text you'd like to comment on.
- Click Add comment
.
- Enter your comment in the box.
- (Optional) To direct your task or comment to a specific person, enter a plus sign (+) followed by their email address. You can add as many people as you want. Each person will get an email with your comment and a link to the file.
- (Optional) To assign the comment to a specific person, check the Assign to box.
- Click Comment or Assign.
Note: If a file reaches the maximum number of comments, you can make a copy of the file without copying over any comments.
You can add personal events to your work calendar where details aren't shown to other people. For example, schedule a doctor appointment or personal sports event and set the visibility of your event to Private. You'll see event details on your calendar, but for others the event shows only as "busy."
To avoid a lot of emails back and forth discussing the availability of guests for your meetings, let the guests modify the event so they can pick a time that suits them.
Let guests modify an event
- On your computer, open Google Calendar.
- Click an event
Edit event
.
- At the right, under “Guests can,” check “Modify event.”
- Click Save.
Note: When you check “Guests can modify event,” they can edit all fields, view the guest list, book rooms, and manage the event as you can.
Let guests modify events by default
- In Calendar, click Settings
- In the Event settings section, click Default guest permissions and select Modify event.
Guests can propose a new meeting time, which the organizer can then review and optionally accept.
Propose a new time (as attendee)
- On your calendar, click the event.
- Next to "Maybe," click the Up arrow
- Select a different time or day.
Tip: You can also add a message to your proposed time. - Click Send Proposal.
Note: If the event organizer has given you access to modify an event, you can reschedule it directly without proposing a new time.
Review proposed times (as organizer)
- On your calendar, click an event with a clock icon.
- Under "Guests," find suggested times.
- Under the time proposal you want to review, click Review proposed time.
- To change the event to the proposed time, click Save.
How proposed times work
- Proposals are turned off for large events with more than 200 guests and all-day events. Learn more about large events.
- All guests can propose a new time. Organizers can’t propose a new time.
- On a computer, in Google Calendar settings, if organizers turn on “Event responses,” they receive email notifications for proposals.
Delete an event to cancel it
If you create an event, you can delete the event. This takes the event off your calendar, and off the calendars of everyone else invited.
- On your computer, open Google Calendar.
- Click the event you want to delete.
- Click Delete event
.
Restore an event
You have approximately 30 days to restore an event that you deleted by mistake.
- Open Google Calendar.
- In the top right, click Settings
- To restore an individual event, next to the event, click Restore
.
- To restore selected events, above the list, click Restore all selected
- To restore an individual event, next to the event, click Restore
Next steps
Google, Google Workspace, and related marks and logos are trademarks of Google LLC. All other company and product names are trademarks of the companies with which they are associated.