What you'll learn
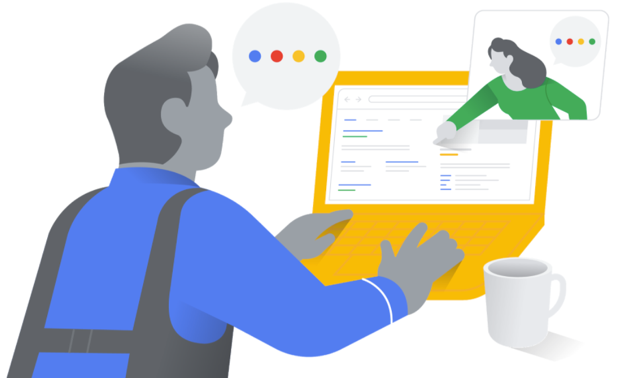
| How to host large virtual events, such as video meetings and live streams, using Google Meet. |
What you'll need
10 minutes
Google Workspace account—Don't have one? Start your 14-day trial today.
In this tutorial
|
1 Create an event with internal and external guests |
The following video shows how to create a video conferencing event for up to 500 guests. If you have more than 500 guests, create a live stream event instead.
Add Google Meet video meetings to Calendar events
Schedule video meetings and invite guests using Calendar
- On your computer, open Google Calendar.
- Optional: If you want to add guests to your event, on the left click Search for people and start typing the names of your guests.
- Click any time on the calendar that doesn't already have an event scheduled.
- Add a title to the event, and any event details.
- Click Save.
Tip: To create a longer event, drag your mouse down the page while you're selecting the time.
Before the event: Create an agenda and share content
- On the Docshomepage, choose an option:
- To start with a blank document, click Create
.
- To use a template, click Template gallery. Try one of the Meeting notes templates.
- To start with a blank document, click Create
- Add your agenda details, including links to files you want to collaborate on.
Note: Make sure participants have the right access level to shared files.
- Click Share to share the agenda.
- In Calendar, attach the agenda to the event:
- In the Calendar grid, double-click the event.
- Click Add attachment
and select your agenda.
- Click Save.
- Click Send.
For details about sharing and access levels, see Get started with Docs.
During the event: Use two Chrome windows
-
In the first window, join the event in Google Meet. Use this window to interact with participants.
-
Instead of presenting the agenda and shared content in Google Meet, open the agenda or shared content in a second window to view and collaborate in real time.
- Put the windows side-by-side so you can see the content and participants at the same time.
- Encourage participants to use the same setup.
Note: Make sure that event presenters know that they should tell participants when to switch to a new piece of content. For example, “Now, take a look at slide 5.”
Optional: During the event, share a virtual whiteboard
If your organization uses Jamboard, you can brainstorm using a virtual whiteboard. Open the Jamboard web app by going to https://jamboard.google.com or open a jam on the Jamboard smartphone app and share it during the event. Anyone can draw, add images, or open Google files during a jam session.
Join the event from Gmail
- Open Gmail and in the sidebar, click Meet.
- Choose an option:
- Click Join a meeting and enter a meeting nickname or code
Join.
- To join a scheduled meeting, point to a meeting under My meetings
- Click Join a meeting and enter a meeting nickname or code
Join the event from Calendar
- In Google Calendar, click the event you want to join.
- Click Join with Google Meet.
- In the window that opens, click Join now.
Join the event from Meet
In Meet, if the meeting is in your list of scheduled events, select it and then click Join now. Alternatively, you can join with a meeting code:
- In a web browser, enter https://meet.google.com.
- Click Enter a code or nickname
enter the details
- The meeting code is the string of letters at the end of the meeting link. You don't have to enter the hyphens.
- You can only use meeting nicknames with people in your organization. This feature is currently only available to Google Workspace users.
-
If your organization has purchased and installed a Meet hardware device, you can also type the meeting code or nickname into that device.
- Click Join now.
If you have issues joining a meeting, see Troubleshoot issues with joining and creating meetings.
- In Google Drive, open the Google Docs, Google Sheets, or Google Slides file you want to share or present.
- (Optional) To edit a document, spreadsheet, or presentation simultaneously with your guests:
- In the upper-right corner, click Share.
- Add a title to your document and click Save.
- Add your meeting guests and give everyone Editor access.
- Click Send.
- Open Google Meet and join the meeting.
- Click Present now and choose what to share:
- Your entire screen
- A window
- A tab
- Click Share.
Tip: If you're not using Chrome browser (which automatically hides any pop-up notifications), mute or turn off notifications so they don’t appear when you’re presenting.
If your camera is turned on, participants continue to see your video while you're presenting.
For presenting issues, see Troubleshoot camera and presentation issues.
Join only to present
When you join to present, only your computer's window or application is displayed in the meeting. No audio or other video is sent or received.
- Go to https://meet.google.com/.
- Choose an option:
- Select the scheduled meeting
- Click Enter a code or nickname
- Click Present.
- Select a window or application.
- Select Share.
Stop presenting
In Meet, depending on how you share content, choose an option:
- Your entire screen or A window—At the top, click Stop presenting or on the bottom, click Stop sharing.
- A Chrome tab—At the top, click Stop.
Recording is only available with the computer version of Meet. Mobile app users get notified when the recording starts or stops, but cannot control recording.
- Open Meet.
- In a video meeting, at the bottom, click Activities
Recording
If needed, go to Can't find the recording button. - Wait for the recording to start.
Other participants are notified when the recording starts or stops. - Click Stop recording when you finish.
The recording also stops when everyone leaves the meeting. - Click Stop recording again to confirm.
When the recording file is ready, it’s saved to the meeting organizer’s My Drive in the Meet Recordings folder. An email with the recording link is also sent to the meeting organizer and the person who started the recording.
2 Create a live stream event |
You can use this feature only if your organization supports it. For help, contact your administrator.
Learn more about the updated live stream experience.
You can add view-only live streaming to an event, such as a company-wide all hands meeting. Up to 100,000 people within your organization can attend.
Create a live stream event for presenters, who can start and stop the live stream during the meeting and record the event. Then, create a second, view-only event for guests.
- Open Google Calendar.
- Click
Create
Event
- Add the event details, such as date, time, and description.
- Add the guests that can fully participate in the video meeting.
- All guests added to this event can be seen, heard, and present their screen.
- People from other organizations and trusted domains can be added. Only people in your organization can record and control streaming.
- Next to Join with Google Meet, click the Down arrow
- Click Add live stream again to confirm.
- Click Save
Note: Streaming does not automatically start. During the meeting, at the bottom right, click, click Live Streaming
To invite specific people to the view-only live stream, create a view-only event. The event is added to their Calendar and includes the link for view-only guests.
People invited to the event are not seen or heard in the meeting, and can’t present, record, or control streaming.
Tip: If invited, view-only guests can join live streams even if their accounts don't support live streaming or their organizations have live streaming turned off.
- Open Google Calendar.
- Click the live stream event you created
Edit
.
- At the top, click More actions
- Add guests or rooms for view-only access, and other details such as a description.
- Click Save
If allowed by an administrator, any participant in the same organization as the meeting organizer can start or stop the live stream. Live streams automatically stop after 8 hours since live streams have an 8 hour time limit.
You can start or stop a live stream if:
- You’re the organizer
- You’re in the same organization as the organizer
- An administrator allows you in the live stream
- You join as a full participant
A view-only guest can only view and can’t control the live stream.
- Open Google Calendar and join the video meeting.
- Select More
- Confirm that you want to start streaming. When streaming is on, at the top left, “Live” is indicated. View-only guests can now watch the meeting using the stream URL.
- Select More
- Confirm that you want to stop streaming.
Full participants from the same organization as the meeting organizer can record the live stream so people can watch the event after the meeting ends. Live stream events are not automatically recorded, so you need to manually start and stop recording.
To record a live stream event, from the meeting, click More Record meeting.
For more details, see Record a video meeting.
For recording issues, see Troubleshoot issues with meeting recordings.
To watch a live stream event, guests can:
- Click the live stream link in the Calendar event or an email.
- Watch from a meeting room that is added to the event and set up with Chromebox or Chromebase for meetings.
When you watch a live stream event, you can:
- Stop and start the live playback.
- Adjust the playback speed and video quality.
- Play the video on a TV.
- Switch to full-screen mode.
Note: To watch the event later, ask the meeting organizer if a recording is available. The live stream can only be viewed while being broadcast live.
Learn more about live streaming at the Google Meet Help Center
3 Best practices for holding remote events |
- Connect to the internet using an Ethernet cable if available. If not, use 5 GHz Wi-Fi (2.4 GHz is often more heavily used and video connections might not be as strong).
- If you’re on Wi-Fi, create a test meeting to make sure you have a strong signal from the location you’ll be working at. Having a direct line of sight to your router often gives you the strongest signal.
- If your connection seems slow, run a speed test to make sure you have at least 3.2 Mbps upload and download speed.
- When you’re on a video conference, limit other internet activity in your house to make sure you have enough bandwidth.
- Sit in a well-lit area, ideally with light shining on your face and not behind, to avoid creating a silhouette. Do a test meeting with a colleague to get camera position and lighting correct.
- Simple backgrounds and neat, tidy rooms tend to look most professional in business meetings.
- Places with minimal background noise work best, but if you’re in a noisy location, mute your mic when not talking, and you can use Meet’s live caption feature to display captions in real time.
Headphones, mic, and camera
- Consider wearing headphones or earbuds to create optimal audio and to reduce any potential echo in the meeting.
- If you’re going to be typing while talking, consider getting an external mic, such as a headset mic or a podcasting USB mic.
- Wired headsets and mics often produce better sound quality than wireless ones.
- Upgrade your headset, mic, and camera to the latest firmware provided by the manufacturer.
- Make sure Meet is using the correct cameras, microphone and speakers. For example, even if you are wearing a headset, Meet could actually be using the built-in microphone:
Address slow device or sluggish performance
- Update your computer to the latest version of your OS.
- Consider presenting from a second laptop, if you have one, or a smartphone (using the iOS or Android Meet app), to spread CPU usage.
- Software or hardware that inspects or alters Meet traffic (such as local firewalls and virus protection software) may decrease video quality. Be careful that these tools don't interfere with your video meetings.
- Use one monitor. Two or more monitors can cause heavy CPU and GPU load.
If you continue to have problems with the quality of your Meet video meeting, see Troubleshoot video & audio quality in a meeting, or you can report a problem.
1 day before:
- Restart your computer.
- Join a test meeting from where you plan to take the meeting to make sure your camera and mic are connected and your internet connection is stable.
10 minutes before:
- Close all your tabs and restart your browser.
- If presenting, open Slides and have your presentation ready to present ahead of time (loading Slides can temporarily spike your CPU, which might affect video and audio quality).
- If you want to see the participants in your meeting while also viewing a presentation, you can change your screen layout.
- Ask participants to mute when not speaking to avoid interruptions. To mute or unmute yourself, at the bottom of the video window, click Mute
or use the keyboard shortcut ⌘/Ctrl + D.
- Establish meeting rules. For example, come back on time after breaks, or be mindful when taking turns to speak.
- Establish a cue for taking turns to speak. For example, send a chat message during the meeting to raise a topic or chime in.
- Admit or deny external participants as appropriate. External participants who aren’t on the Calendar event will need to ask to join the meeting. Someone in the video meeting who’s in the same domain as the event organizer needs to accept their request before they can join the meeting. Ask participants to join 10 minutes early to avoid delays in starting the event.
Google, Google Workspace, and related marks and logos are trademarks of Google LLC. All other company and product names are trademarks of the companies with which they are associated.