You can add new images and videos by the following methods:
- Use the Import assets command
- Drag assets from your computer file system browser
- Access your Studio Asset Library
- Create an image or video element and specify the source
- Replace an existing image
Local images and videos that you use in Google Web Designer are automatically added to the Library if they're a supported type, so you can easily reuse them in the document.
SVG images
You can import SVG files either as images or as inline code.
Images and AMPHTML ads
AMPHTML ads use amp-img instead of the img tag. Google Web Designer automatically uses the appropriate tag when you add an image in Design view.
Videos and events (interactive video)
If you want to use events with your video, make sure to use the Video component instead of adding a video element with the Element tool.
Video ads
Images and videos within video ads can be used as media clips.
Add a new image or video
Import images or videos
- In the File menu, select Import Assets..., or use the keyboard shortcut, Ctrl + Shift + i (Windows) or ⌘ + Shift + i (Mac).
- Select the file or files you want to import using the dialog.
The assets you select appear in the document workspace and in the Library.
Add images or videos by dragging from your computer
- Select the image or video that you want to add, using your computer's file system browser. You can select multiple files.
- Drag the image or video to the document workspace in Google Web Designer.
Add images or videos from the Studio Asset Library
- Select Studio from the dropdown at the top of the Library.
- Connect with the Studio Asset Library by clicking the Launch button.
- If you're not signed in, you'll be prompted to sign in to the Google Account that's associated with your Studio account.
- Navigate through the folder structure to the asset that you want to use.
- Drag the asset from the Library to the document workspace where you want to use it.
A copy of the asset is added to the local Library under the studio folder.
Replace an image in the document
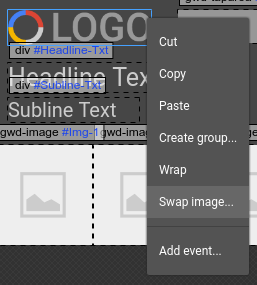
The "Swap image" function lets you replace an image with another one. This is helpful when you're replacing stock images in a template.
- Right-click the image you want to replace.
- Select Swap image... from the pop-up menu.
- In the dialog, either select an image from the Library or click Import assets
to import an image from your computer.
- Click OK.
If you don't see the Swap image... command, make sure you've selected the image and not a parent element or another element overlaying the image. The Outliner panel provides an easy way to check which element you've selected.
Add an image or video by using the Element tool
- Select the Element
tool in the toolbar.
- Select Image element
or Video element
in the tool options bar.
- Create an element of the size that you want by clicking and dragging in the workspace.
- Set the source for the image or video in the Properties panel.
Images will be resized and stretched to fit the dimensions of the drawn element. Videos will display at the largest size that can fit in the drawn element's dimensions without changing the aspect ratio.
Use images and videos from the local Library
You can see images and videos that you've added to this document in the Library panel.
- In the Library, select image or video assets by clicking their names.
- Drag the assets to the workspace where you want to use them.
Web Designer stores copies of the local Library asset files in the assets subfolder inside the Google Web Designer project folder in your computer file system.
Resize images and videos
Once you've added an image or video, you may want to resize it or adjust the scaling.
Preview videos
You can preview videos inside the Google Web Designer interface if they're in a Video component or a video ad.
To see how a video will appear in your project, preview your document in your preferred browser by clicking the Preview button in the upper right corner. This option is unavailable for video ads.