A step is a basic element in a process that defines a task to be carried out. A process can have several steps.
Add a step in a process and configure the step type, as described in the following sections. For more advanced automations, you can use values from a previous step in a non-reusable action or task.
Add a step in a process
To add a step in a process, click Add a step in the process flow and do one of the following:
-
Choose from the list of suggestions
AppSheet Automation is an intent-aware platform. The platform understands user intent and recommends configuration options that align with what you are trying to achieve. For example, selecting the following bot suggestion would configure a step with a basic Send an email task for you:
When a new NationalParks record is created, send an email -
Create a custom step
Click Create custom step, select a step type from the drop-down list, and configure the step as described in the following sections.
Supported step types
The supported step types are described in the following sections.
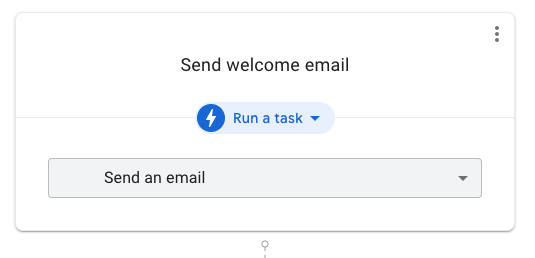
The Run a task step type allows you to run a specific task, such as Send an email. For a complete list of types, see Supported task types.
In the following example, the Send welcome email step runs a task named Send an email against the data provided to the process, such as a new employee record.
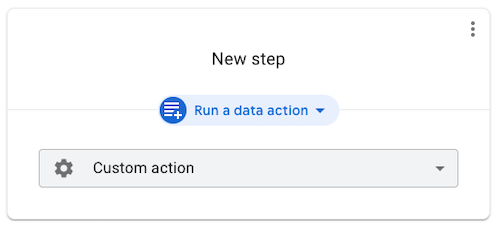
Run a data action
The Run a data action step type allows you to perform a data change action on your app, including one of the following:
- Add new rows: Add rows to the selected table.
- Delete row: Delete the current row.
- Set row values: Set values for specific columns using the Expression Assistant. To add additional columns, click Add.
- Run actions on rows: Run the selected action on one or more rows in the selected table. Specify the rows using the Expression Assistant.
- Grouped actions: Run a group of actions. To add actions, click Add.
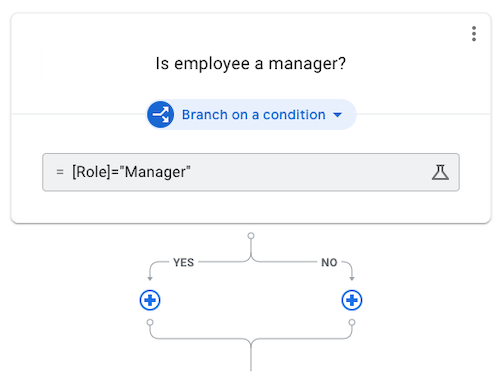
Branch on a condition
The Branch on a condition step type allows you to implement conditional logic in your process. For example, if <condition> , then <do step>, else <do another step>. The condition value can be any valid expression.
The Wait step type allows the process to pause execution and before resuming:
-
Wait for a condition to evaluate to
TRUEor a timeout period to be reached
To understand Wait step limits, see Automation limits.
Wait for a condition
Wait for a condition to evaluate to TRUE (based on a data change) or a timeout period to be reached before resuming execution.
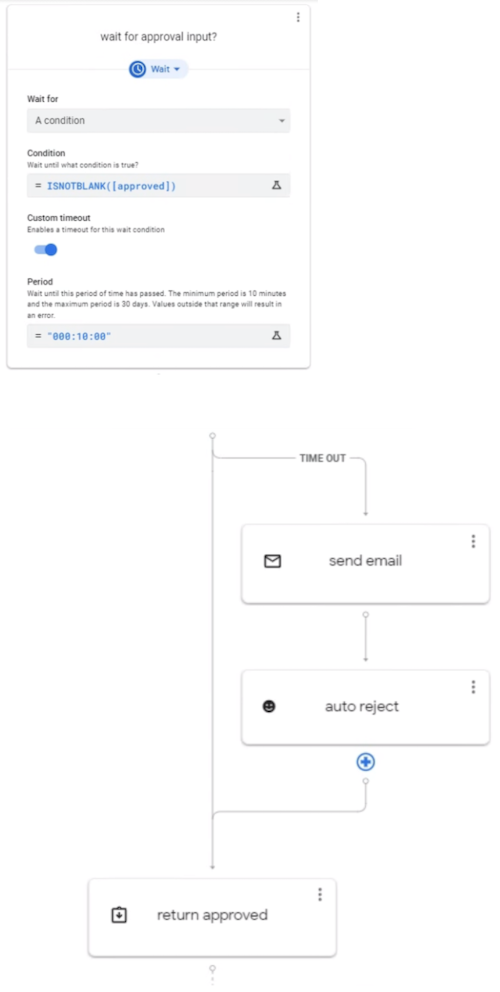
Add a Wait step to the process flow and configure the following settings:
|
Setting |
Description |
|
Wait for |
Select A condition from the drop-down list. |
|
Condition |
Enter an expression that defines the condition that if |
|
Custom timeout |
Optionally, enable Custom timeout and do the following:
If Custom timeout is not enabled, the process execution will terminate after 30 days if the condition does not evaluate to |
Wait for a period of time
Wait for a period of time before resuming execution.
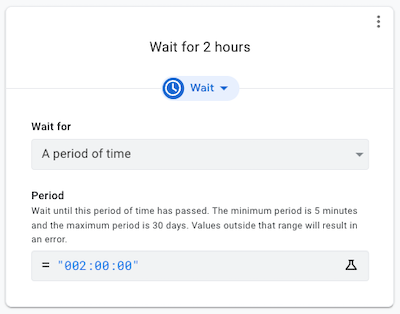
Add a Wait step to the process flow and configure the following settings:
|
Setting |
Description |
|
Wait for |
Select A period of time from the drop-down list. |
|
Period |
Enter an expression that specifies the period of time to wait before resuming execution as a |
Call a process
Select one of the following options to process the input:
-
Add: A new row will be created using the data you supply. If another row exists with the same key, that row will be updated and used.
-
Lookup: The row will be retrieved using the key. Any additional columns will be used to update the row. (Only non-composite keys are supported.)

Return values
The Return values step type allows you to return specific values from within your current process. Typically it's the last step in your process. The return values are accessible to the process that calls your current process via the Call a process step.
You might want to have a parent process invoke a child process, and use the return value of the child process to determine the next steps to be performed. The parent process calls the child process and references the returned value using the following format: [child-process-name].[return-value]
For example, a child process, Send for approval, contains a Return values step that returns two values ApprovalAmount and ApprovalDecision, as shown below:

The parent process calls the child process using the Call a process step and references the ApprovalDecision value from the child process using the expression [Send for approval].[ApprovalDecision].
Use values from a previous step in a non-reusable action or task
For a non-reusable action or task (that is, Linking is disabled for the action or task), you can use values returned from a previous step in your automation flow.
For example, you can use the email address returned from a previous step when configuring the To setting for a Send an email task: [Step].[Email]