After validating the metadata for an upload batch, you're ready to upload the files. You upload content by copying the necessary files into your dropbox, then letting us know that they are ready by creating an empty file named delivery.complete.
Which files you need to complete an upload depends on which asset type you’re uploading. Every upload job must include a metadata file in XML or CSV format and any new media files that the metadata file references by name.
We recommend uploading new assets one at a time, each with its own dropbox folder and metadata file. For example, if you’re uploading three episodes of a TV program, create three separate folders and three separate metadata files. This approach makes it easier to track the progress of the upload and limits the impact of any issues that occur, without any impact on the upload processing speed.
To upload content to your Aspera dropbox:
Open your Aspera client.
Select the connection for your dropbox in the Connection box on the right, then click the Connect button.
The Aspera client connects to your dropbox and displays the top-level folders.
If you haven't set up a connection for your dropbox yet, see Connecting to your Aspera dropbox.
Create a new folder for the new upload job.
To create a folder, right-click on the parent folder and select New > Folder. To avoid possible conflicts, we recommend that you create a new directory each time you post content and that you include a timestamp or incremental ID in each directory's name.
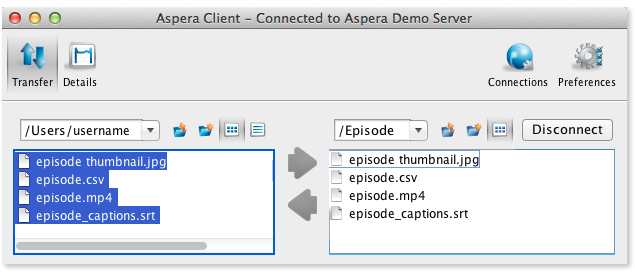
Copy all of the files for the upload package into the new folder.
To copy files into a folder, make sure the intended folder is open on the right, highlight the files in the box on the left, and click the right-facing arrow.
When all files are copied, upload the delivery.complete file to the same folder.
After processing each upload batch, the upload engine posts a status report detailing the actions taken for each item in the batch. The report is named status-xml-filename, where xml-filename is the filename of your metadata file. The status report is placed in your dropbox in the same directory as the upload batch.
The time needed to process an upload batch and generate a status report varies depending on system load and the actions requested. For example, the system requires much less time to process updates to an asset's metadata than to process new reference files. The upload engine will also spend additional processing time on batches that generate failed actions, because the system retries certain failed actions to ensure that failures were not caused by transient conditions such as system downtime. In some cases, we may require more than one day to process an upload batch.