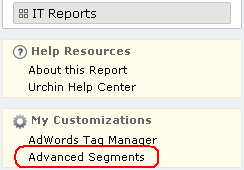
Advanced Segments
Advanced Segments is a new feature that allows you to filter reporting data similar to using GA Advanced Segmentation. The feature is accessible on the Urchin Reporting UI from the toolbar.

Note: Advanced Segments are applicable for the reports where the Analytic Options/Cross Segment Performance option is available.
Each advanced segment is a combination of filters joined by "AND" condition. Metrics support numeric comparison operators "equals to", "less than", "less than or equal to", "greater than" and "greater than or equal to". Dimensions support regular expressions with operations "matches" and "does not match".
Example: "referral" matches "yahoo" AND "pageviews" greater than "1"
The Advanced segments editor is available on the My Customizations -> Advanced Segments page.

Advanced Segmentation
Advanced Segmentation provides the functionality to manage advanced segments and apply them to reporting data. There are altogether four different types of advanced segmentation:
- visit segmentation - advanced filters can be applied to dimensions and metrics that are linked with visits
- path segmentation - advanced filters can be applied to dimensions and metrics that are linked with paths - supported only through the Data API v2.0
- transaction segmentation - advanced filters can be applied to dimensions and metrics that are linked with transactions - supported only through the Data API v2.0
- transaction item segmentation - not supported
The Manage Urchin Advanced Segments page can be found under the My Customizations -> Advanced Segments link. This page displays a list of segments that have been configured and provides controls for creating, editing and removing the Advanced Segments.
Creating New Segments
To create and configure a new segment, click the Create new custom segment button on the Manage Urchin Visit Segments page.

Provide a Segment Name, select Dimension or Metric, select Condition and provide required Value.

Click Add 'and' statement to add a new Dimension or Metric to the segment. Click Save to complete the New Segment creation. Once the segment is created, it can be edited, deleted or applied to other profiles (according to User access permissions).
Note: For detailed information about Urchin variables and corresponding dimension and metric names please refer to Advanced Segments mapping document.
Editing Segments
To edit a segment, click the edit link in the Actions area for the corresponding segment.

While editing, the user may change the segment's Name, Dimension or Metric, Condition and Value and to add additional Dimension or Metric query strings to the segment.

Unwanted Dimension or Metric query strings may be removed from a segment definition by clicking the delete button.
Deleting Segments
To delete an existing segment, click the delete link in the Actions area for the corresponding segment.
Applying Segments to the Profiles
A default set of advanced segments is visible to all users and all their profiles. New advanced segments can be shared across profiles of the user. To make a segment visible to all profiles of the current user, click the apply to all profiles link at the Actions section near the corresponding segment.
In order to limit visibility of the segment to the current profile only, simply 'Edit' and 'Save' it - the re-saved segment will be visible for the current profile of the current user.
Known limitations:
- Current implementation of the Advanced Segmentation does not support segmentation of paths, transactions and transaction items. Only metrics are segmented. Applying the segmentation to the reports in corresponding sections will result in "(no data)" for dimensions.
- Data Over Time, To-date Lifetime Value, Visitor History Drilldown and Cross segmentation do not take into account the Advanced Segments.