You can build a banner with Google Web Designer from scratch or to save time, you can start from a pre-built template.
Start from scratch
If you want full control of the creative design, you can start from a blank banner file in Google Web Designer.
Step 1: Create a new file- Open Google Web Designer. (If you don't have it yet, download Google Web Designer here.)
- From the launch screen, click Create New File or click File > New...
- In the "Create New Blank File" dialog, choose Banner as the ad type.
- Choose from the following options:
- Name
Give the ad a name (required). This will be the name of the HTML file. - Location
Choose where you want to save the file. You can save your file locally on your computer, or save to Google Drive. - Environment
Select Display & Video 360 as the ad serving environment. - Dimensions
Either check "Responsive layout" to create an ad that automatically sizes to match the viewport or ad slot it's displayed in, or set the dimensions for the ad if you know the specific size. Common banner sizes are listed in the dropdown list. If you want to use a size that isn't listed, select Custom from the dropdown, and enter the width and height manually. - Animation mode
Select the animation mode that you want to use initially (you can switch at any time). Quick mode lets you animate your ad scene by scene, while Advanced mode lets you animate individual elements on their own timeline
- Name
- Click OK.
When you create a new banner ad, Google Web Designer creates a banner page (page1) sized to the banner size you specified.
To set up your primary banner page:
- Add images, video and other assets by dragging them into the work area, or by using image tags.
- Arrange your images and any other elements you want to use on the stage.
- Optionally create animations or bring components onto the page.
- If you're creating a Responsive ad, add breakpoints, then restyle each new size range.
The final step to creating an effective ad is to add a call to action. A typical call to action is a clickable button that takes the user to a company website.
- Be sure your ad has a button or other clear visual call-to-action element for the user to click or touch.
- Drag the Tap Area component from the Interaction folder of the Components panel to the stage, and position it over the call to action.
- Click the new event button
in the Events panel.
- In the event dialog, select the following options:
Target The Tap Area component ( gwd-taparea_1)Event Tap Area > Touch/Click Action Google Ad > Exit ad
Note: A similar action, Exit ad (overrides URL), doesn't allow you to modify the URL outside of the creative, such as within Studio or Campaign Manager 360, and should only be used for dynamic ads.
Receiver gwd-adConfiguration - Metrics ID - A label (e.g., "CTA") to make reports easier to understand.
- URL - The exit URL.
- Collapse on exit - For expandable ads, check to collapse the ad when the user closes the ad.
- Pause media on exit - Check to stop video and audio playback when the user closes the ad.
- Collapsed page on exit - For expandable ads, the page to show when the user closes the ad.

Start from a template
Templates are pre-made ads in popular sizes, using generally popular styles and features. By replacing the images and other assets, you can quickly create a useful, working ad.
Step 1: Create a new file from a templateTo create an ad from a template:
- Select New from template... from the File menu. This opens the Template Gallery.
- To find Google Marketing Platform banner templates:
- Click Search
.
- Expand the Ad Types section, then select Banner.
- Expand the Platforms section, then select Display & Video 360.
- Close the filters panel. A list of compatible layouts will display.
- Click Search
- Click a creative type to see available layouts, then click Use Layout for the layout you want.
- If there are multiple size options, select the size you want.
- Name your new file (required).
- Optional: Change the location where the file will be saved. You can either enter the path to the location, or click the folder icon
to navigate to the location you want to use.
- Click Create.
Ad templates have placeholder assets and descriptive IDs for each element. To create an ad from a template, you can just replace each generic placeholder asset with an appropriate one for your ad. Ads created from templates are completely modifiable; you can add or delete assets, components, and events as you wish to create a more customized ad.
The "Swap Image" function lets you replace an image with either an image in the Library or an image that you upload. This is especially helpful when you're replacing stock images from a template.
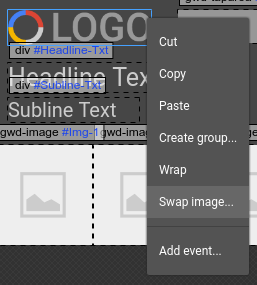
To replace an image in an ad created from a template:
- Right-click the image you want to replace.
- Select Swap image... from the pop-up menu.
- In the dialog, either select an image from the Library or click the add button
to select an image from your computer.
- Click OK.
Preview
Preview your ad in your browser to make sure it looks and behaves how you expect. Use the Preview button instead of directly opening the source .html file in your browser.