Use account labels to classify and organize CSS domains or merchant accounts into meaningful groups. For example, you might create customized labels to indicate the market of specific accounts, or set up tiering for your merchant accounts. Once account labels have been added, you can use them to sort or filter accounts. In addition to creating and using your own labels, you can also use automatic labels which are automatically applied to your accounts. Remember labels are for your reference only and will not surface in Merchant Center.
Your labels
You can create and use labels to group merchants based on category, performance, size, or other aspects.
Some possible labels might be:
- Top 5 strategic merchants
- Top 3 revenue-generating merchants
- Merchants added in 2019
- John Smith’s accounts
- Fashion industry accounts
- Self-service accounts
Automatic labels
To help you manage your associated merchant accounts, Google dynamically assigns a set of automatic labels for you. These labels allow you to easily hone in on the accounts that matter most, and can be used for filtering views in CSS Center. Automatic labels are applied on the CSS domain level.
The following automatic labels are available:
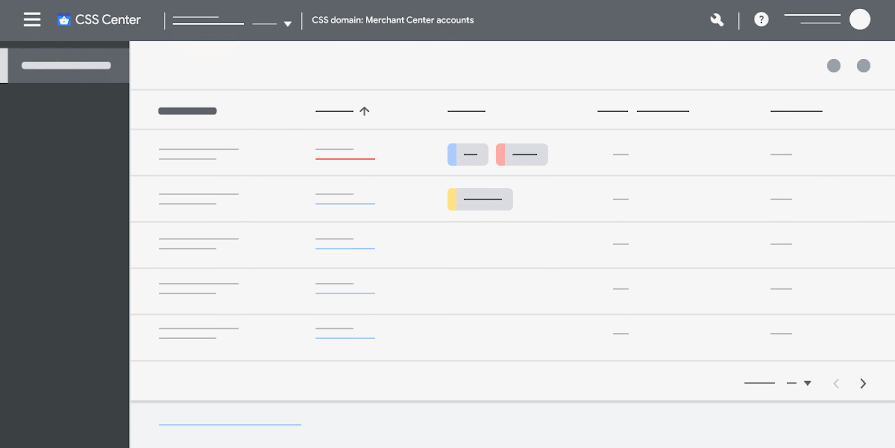
Top 10: Account is one of your top 10 accounts (standalone, MCA sub-account, or marketplace) with respect to paid clicks over the last 30 days.
80% of clicks: Top accounts that together are responsible for 80% of overall CSS domain paid clicks over the last 30 days.
Not active: Accounts that have not received any paid clicks in the past 30 days.
Instructions
To add a new label to a CSS domain

Select the CSS domain to which you’d like to add a label, then:
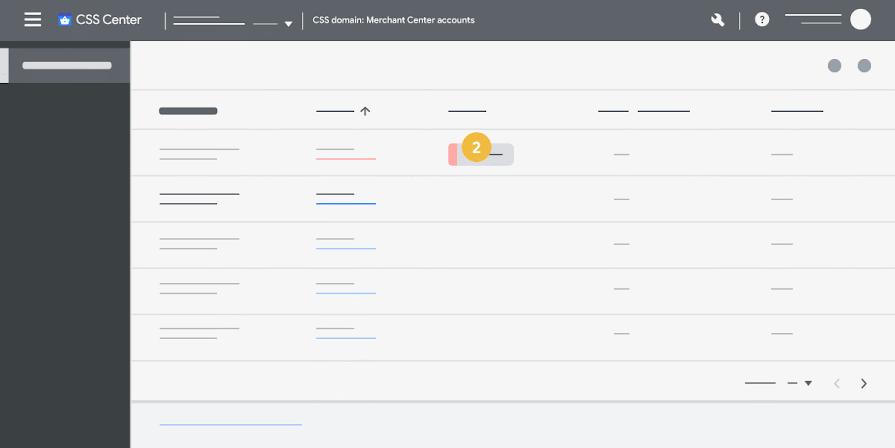
- Click the pencil icon
in the “Label” column to add or edit a label.
- Click New Label.
- Enter a name for the label, as well as a description (optional).
- Click on the circle beside the label name to choose a color to help identify your label (optional).
- Click Create.
- Check the box beside the new label to apply it to the domain.
- Click Apply.
 in the “Label” column to add or edit a label.
To add a new label to a merchant account
Locate the merchant account to which you’d like to add a label, then:
- Click the pencil icon
- Click New Label.
- Enter a name for the label, as well as a description (optional).
- Click on the circle beside the label name to choose a color to help identify your label.
- Click Create.
- Check the box beside the new label to apply it to the merchant account.
- Click Apply.
To apply one of your labels to a domain or account
Locate the domain or merchant account to which you’d like to add the label, then:
- Click on the pencil icon
- In the search bar, enter the name of the label you would like to apply.
- Check the box beside the label.
- Click Apply.
To remove one of your labels from a domain or account
Locate the domain or account to which the label has been added, then:
- Click on the pencil icon
- Uncheck the box beside the label to remove it from the domain or account.
- Click Apply.
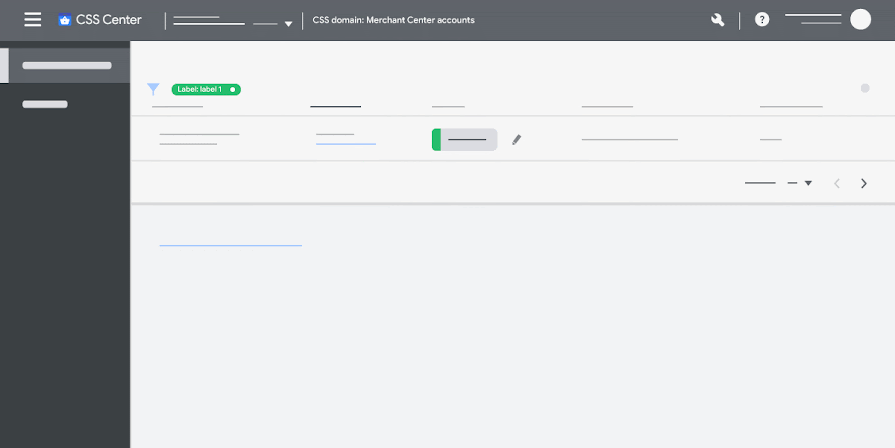
To filter domains or accounts by labels
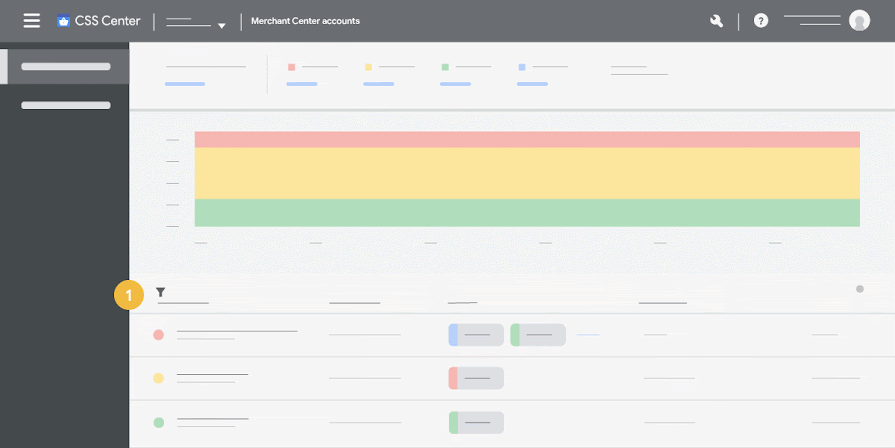
Locate the domain or merchant account by which you’d like to filter, then:
- Click on the filter icon
.
- Click Labels, then choose either Automatic labels or Your labels.
- Check the box beside the labels that you’d like to use to filter your view.
- Click Apply.
 .
.Entries will filter to show you only those to which the label has been applied.
To delete one of your labels
Locate a domain or account to which the label has been added, then:
- Click on the pencil icon
- Click on the pencil icon
- Click the delete icon
on the bottom of the box.
- In the pop-up box, click Delete.