By default, the definitions of the fields in your reports match how those fields are defined in the underlying data source. Specifically, fields in the report have the same name, data type, and aggregation as in the data source.
The Field Editing in Reports data source option allows report editors to change field definitions at the chart level. Editing field definitions in the report makes customizing your reports faster and easier. It reduces or even eliminates the need to duplicate fields in the data source in order to apply different aggregations or functions to the same data. It also allows you to have canonical field definitions in the data source, while tailoring the fields to fit different report requirements.
In this article:Enable/disable field editing in reports
You enable or disable field editing in reports at the data source level. New data sources have this option turned on by default. You must be able to edit the data source to change this.
To turn this off or on (for older data sources), follow these steps:
- Edit the data source(s) used in your report
- In the data source header, click Field Editing in Reports.
How editing fields in reports works
When you create a report based on a data source that has the Field Editing in Reports setting turned on, all the fields in the report that use the data source become editable. This option applies to all reports that use that data source. To edit a field definition in a report, follow these steps:
- Create or edit your report.
- Add a new chart or select an existing chart.
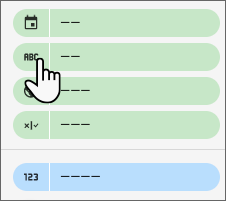
- In the Setup tab of the Properties panel, click a field's data type icon to open the field's edit menu.
What you can edit
Editing a field lets you change the following:
- The field's name. For example, you can rename Order Value to Average Order Value.
- A metric's aggregation. For example, you can recalculate Order Value from Sum to Average.
- This option isn't available if the field is a metric with Auto aggregation type.
- The field's data type. For example, you can convert a Number to a Percent, or Text to a URL, or a full Date to a date part.
- A metric's comparison calculation. For example, you can apply a Percentage of Total function to your orders.
- A metric's running calculation. For example, you can show running sums of your data, record by record.
- A calculated field formula, a custom bin definition, or a custom group definition.
- A dimension's drill actions (for table charts only).
- A custom value format for a Numeric or Date & Time type dimension, metric, or calculated field.
Learn more about comparison and running calculations.
Any changes that you make to a given field apply only to that instance of that field in that chart. For example, if the Average Order field appears in a table and a bar chart in the same report, changing any of the attributes of that field in the table has no effect on the Average Order field in the bar chart.
Rename a field
You can change a field's display name in the selected chart. This lets you have multiple instances of the same field in a chart. For example, you can add two instances of the Order Value field to a table and change the name of the second instance to Average Order Value. Use the aggregation options that are described next on this page to change how the field is calculated.Change the field aggregation
A field's aggregation determines how its data is calculated in the chart. You can select from the following aggregations:
- Average
- Count Distinct
- Count
- Max
- Median
- Min
- Standard deviation
- Sum
- Variance
Metrics with an aggregation of Auto can't be changed.
Change the field data type
A field's data type tells Looker Studio what kind of data to expect as input. For example, Looker Studio displays Text fields "as is," with no other processing. Even if the field contains numbers, Looker Studio won't apply any numeric aggregation to it. A field defined as a URL, on the other hand, is displayed as a hyperlink.
When the specified data type and actual data don't match, unexpected results can occur. You can adjust a field's data type in circumstances when the data source hasn't been correctly configured and you don't have edit access to it. For example, converting a dimension containing valid data but defined as Text to a Date type can let you use it as date range dimension.
You can also further customize how Numeric and Date & Time field type values are displayed by applying custom value formatting to dimensions, metrics, and custom fields in charts.
Change the date granularity
Changing a Date & Time field type aggregates the data by the new type. For example, instead of grouping your data by year, month, and day, you can group by year and month.
For example, if the date field contains the complete year, month, and day, you can group by year quarter.
Example
The following tables show the same data. The first table groups Qty Sold by Date and Item, listing each item and Qty Sold more than once; the second table groups Qty Sold by Item with the time granularity set to Year Quarter, which results in each item listed once with their quarterly Qty Sold for Q4.
| Date | Item | Qty Sold |
|---|---|---|
| Oct 1, 2016 | Healthy Dog Dog Food |
3 |
| Oct 1, 2016 | Hungry Kitty Cat Food | 1 |
|
Oct 1, 2016 |
Pretty Bird Bird Seed | 5 |
| Oct 1, 2016 | Happy Cat Catnip | 1 |
| Oct 2, 2016 | Pretty Bird Bird Seed | 3 |
| Oct 2, 2016 | Happy Cat Catnip | 2 |
| Oct 2, 2016 | Parrot Perch | 4 |
| Oct 3, 2016 | Playful Puppy Toy | 9 |
| Oct 3, 2016 | Hungry Kitty Cat Food | 2 |
| Oct 4, 2016 | Pretty Bird Bird Seed | 5 |
| Grand Total | 62 |
| Date | Item | Qty Sold |
|---|---|---|
| Q4, 2016 | Pretty Bird Bird Seed | 20 |
| Q4, 2016 | Healthy Dog Dog Food | 16 |
| Q4, 2016 | Playful Puppy Toy | 11 |
| Q4, 2016 | Parrot Perch | 8 |
| Q4, 2016 | Happy Cat Catnip | 4 |
| Q4, 2016 | Hungry Kitty Cat Food | 3 |
| Grand Total | 62 |
You can also further customize how Numeric and Date & Time field type values are displayed by applying custom value formatting to dimensions, metrics, and custom fields in charts.