Start here if you have a new Google Nest camera, or if you removed your camera from the app and want to add it back.
To set up, the app takes you through the steps. You need the app to connect your camera to Wi-Fi and get recorded video, so you should always use the app to guide you through setup and installation.
Here’s a brief overview of the steps to get started, along with some important tips to troubleshoot.
Important: Connect your camera to the app before you install or mount it. You need to scan the code on your camera to connect it to the app.
1. Download the app you need
Depending on which camera model you have, use either the Google Home app or Nest app to set it up. Download the one you need from the Apple App Store or the Google Play Store.
Use the Google Home app to set up the following Nest cameras:
- Nest Cam (wired)
- Nest Cam with Floodlight
- Nest Cam (battery)
Use the Nest app to set up the following Nest cameras:
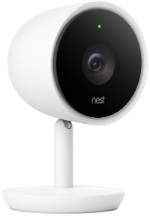
- Nest Cam IQ Indoor
- Nest Cam IQ Outdoor
- Nest Cam Indoor
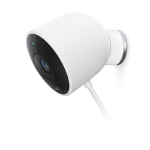
- Nest Cam Outdoor
2. Add your camera to the app with the QR code
Choose the instructions that match the app you use to set up your camera.
Home app
- If you haven’t already done so, download the Home app from the Apple App Store or Google Play Store.
- Open the Google Home app
. If prompted, sign in with your Google Account.
- Tap Devices
Add
.
- Choose the home you want to add your camera to, or select Add another home to create a new one. Then, tap Next.
- The app looks for nearby devices. When prompted, select the camera model you have as the device you want to set up.
- Use your phone’s camera to scan your camera’s QR code. You can also tap Continue without scanning and enter the setup code.
Tip: If you don’t know where the setup code is, tap Find the code for help. - The app walks you through setup and installation.
 . If prompted, sign in with your
  Add
Add  .
.Nest app
If you're new to Nest
- If you haven’t already done so, download the Nest app from the Apple App Store or Google Play.
- Open the app and create an account.
- On the app home screen, tap Add
.
- Scan the QR code on the back of your camera. You can also tap Continue without scanning and type the numbers at the top of the QR code.
- The app walks you through setup and installation.
 .
.If you already have an account
- Open the Nest app
.
 .
.Note: If you have more than one home in your account, make sure that you first selected the Nest home where you want to install your camera. Tap Menu 
- In the top right corner of the app home screen, tap Settings
.
- Select Add product
.
- Scan the QR code on the back of your camera. You can also tap Continue without scanning and type the numbers at the top of the QR code.
- The app walks you through setup and installation.
 .
. .
.Add your camera to the Home app after setup
After setup in the Nest app, you can add your Nest camera to your home in the Home app. This lets you control your camera and other compatible connected devices (like a smart bulb or Google speaker) in the same place.
Set up smart devices in the Google Home app
Note: If you already signed into the Nest app with a Google Account, your Nest camera and some other products in your Nest home should also appear in your home in the Home app.
3. Get more help with setup and installation
Troubleshoot issues during setup
During setup, the app lets you connect your camera to Wi-Fi, personalize settings, check the video quality, and more.
If you have any issues, here are some quick tips.
Help messages and codes
If a help message with the code appears in the app, get detailed troubleshooting help from our interactive troubleshooting tool for Nest cameras and doorbells.
Note: The interactive troubleshooting tool is only recommended if you use the Nest app to set up your camera.
Connection issues
If you can’t find your Wi-Fi network, or if your camera has trouble connecting to the Wi-Fi, here are a few things you can do to try and fix the issue:
- Wait a few minutes, then try to connect your camera again.
- Move your camera closer to your Wi-Fi router to improve the signal.
- Reduce wireless interference.
- Try to restart your router.
- If you have a hidden Wi-Fi network, you need to type in the network name (SSID) manually.
For more tips, go to our Troubleshoot adding Nest camera to the app article.
Power issues
Signs that your camera doesn't get enough power include the following:
- Your camera won’t turn on.
- You get a message or status in the app that tells you there isn’t enough power.
- Things like the Wi-Fi connection and the video quality can also be reduced when there isn’t enough power.
Here are some things you can do to try to fix the issue:
- If your camera uses a cable to stay powered, check that the cable and power outlet work properly. Use another compatible cable or power outlet with your camera to check if it works.
- If your camera is battery powered, recharge it when the battery is low. You should also make sure it’s seated correctly on its stand when you remount it.
Video quality issues
If your camera has video delays or lag, it’s usually a sign that the Wi-Fi connection is weak. It could also be a sign that your camera doesn’t have enough power. Try the following to try to fix the issue:
- Move your camera closer to your Wi-Fi router to improve the signal.
- Reduce wireless interference.
- If your camera uses a cable to stay powered, check that the cable and power outlet are working properly. Use another compatible cable or power outlet with your camera to check if it works.
- If your camera is battery powered, recharge it when the battery is low. You should also make sure it’s seated correctly on its stand when you remount it.
If your camera’s video is distorted, here are a few things you can try to fix the issue:
- Dust off the camera lens.
- Angle the camera so that it’s not directly facing the sun’s beams.
- Put your camera somewhere shady and protected from extreme weather conditions. While outdoor cameras are built to work outside of your home, extreme hot or cold temperatures can affect things like the video quality.
For more tips, go our Troubleshoot Nest camera video distortion article.
Get more installation help
The app gives you basic installation instructions to mount or install your Nest camera. But if you need more tips for your camera, select your camera below for detailed instructions.
| Nest Cam (wired) | Nest Cam (battery) | |
 |
 |
|
| Nest Cam IQ Indoor | Nest Cam Indoor | |
 |
 |
|
| Nest Cam IQ Outdoor | Nest Cam Outdoor |