This article is for people who manage Google services or devices for a company, school, or group. If you're using a personal (@gmail.com) account, go instead to the Google Account Help Center.
Open the customer's Admin console
- Open the Customers page in the Partner Sales Console and click the customer's name.
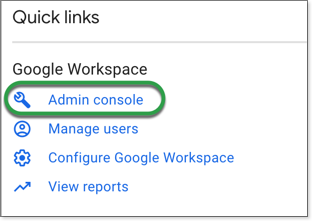
- Under Quick links, click Admin console.

- In the upper left, click Verify domain.

The Google Workspace setup tool opens, which will guide you through the remaining steps of this process.
Verify the customer's domain and activate Gmail
|

|
Find your customer's DNS records
(a)
|
In a new tab, sign into your customer's domain registrar.
|
(b)
|
Go to the section where you can update the domain's DNS records. This section is typically called:
- DNS settings
- DNS management
-
Advanced settings
|
|

|
Add a TXT record to confirm domain ownership
(a)
|
Switch to the browser tab that has the setup tool open and copy the verification code.
|
(b)
|
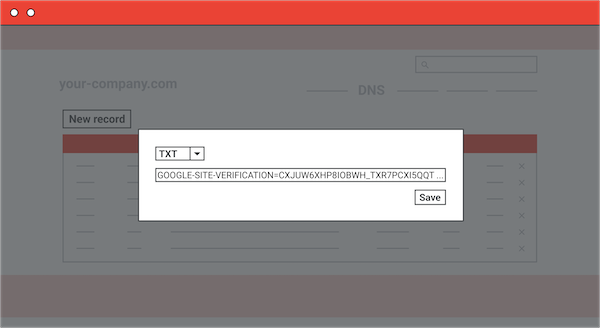
Create a new TXT record on the registrar's web site.
- Look for a field labeled Name, Host, or Alias. Enter @. (If @ causes an error leave this field blank).
- Paste the verification code you copied into the field labeled Value, Answer, Destination, or Server.
- Enter 1 hour in the TTL field, or you can leave the default value.
Add a TXT record to a subdomain
If you're adding a subdomain, enter the subdomain in the registrar's Name/Host/Alias field. For example, if the new subdomain is support.your-company.com, you would add support to the Name/Host/Alias field. Don't enter @ in this field.

|
(c)
|
Return to the setup tool and click Verify my domain.
|
|
| |
|

|
Set up the MX records for Google Workspace
(a)
|
Review your customer's existing DNS records and delete any non-Google MX records you see.

|
(b)
|
Create a new MX record.

- Look for a field labeled Name, Host, or Alias. Enter @. (If @ causes an error, leave this field blank.)
- Copy the MX record from the setup tool. Paste it into the field labeled Value, Answer, Destination, or Server.
- Enter 1 hour in the TTL field, or you can leave the default value.
- Enter 1 in the priority field.
Note: if the registrar rejects a Google MX record, try adding a period after the .COM.
|
(d)
|
Continue using the setup tool to add any other MX records required for the customer's domain.
|
(e)
|
Click Activate Gmail in the Workspace setup tool.
|
|
|
Set up Gmail security
We recommend you enable email authentication and security methods for Gmail.
Best practices for email authentication
We recommend you always set up these email authentication methods for your domain:
- SPF lets servers verify that messages appearing to come from a particular domain are sent from servers authorized by the domain owner.
- DKIM adds a digital signature to every message. This lets receiving servers verify that messages aren't forged, and weren't changed during transit.
- DMARC enforces SPF and DKIM authentication, and lets admins get reports about message authentication and delivery.
For detailed steps, go to
Help prevent spoofing, phishing, and spam.
Google, Google Workspace, and related marks and logos are trademarks of Google LLC. All other company and product names are trademarks of the companies with which they are associated.