Notification

Bring your best ideas to life with Gemini for Google Workspace. Get tips & real-life use cases for using gen AI at work.

Switch from Excel to Sheets

Collaborate in Sheets

On this page

Share spreadsheets

Excel: 
Share workbook

Sheets: 
Share with specific people or using a link


Share workbook in 2013 version.

Excel 2013
 

Options in 2010  version (protect, allow, track).

Excel 2010

Share with specific people:

  1. Open the file you want to share (that you own or have edit access to).
  2. Click Share.
  3. Enter the email addresses or groups that you want to share with.
  4. Choose what kind of access you want to give people: Editor, Commenter, or Viewer.
  5. Click Send.


Share using a link:

  1. Open the file and click Share.
  2. Under Get link, click Copy link.
  3. (Optional) To change permissions, click Change, then choose Viewer, Commenter, or Editor.
  4. Copy and paste the link in an email or any place you want to share it.

For more details, see Share files from Google Drive.

Click Share to open the window where you add people, then click Send.

Add comments and assign tasks

Excel:
Comment

Sheets:
Add comments and assign tasks

 Add a new comment in 2013 version.

Excel 2013
 

New comment in 2010 version.

Excel 2010

 
  1. In Docs, Sheets, or Slides, select the text you'd like to comment on.
  2. Click Add comment .
  3. Enter your comment in the box.
  4. (Optional) To direct your task or comment to a specific person, enter a plus sign (+) followed by their email address. You can add as many people as you want. Each person will get an email with your comment and a link to the file.
  5. (Optional) To assign the comment to a specific person, check the Assign to box.
  6. Click Comment or Assign.

Note: If a file reaches the maximum number of comments, you can make a copy of the file without copying over any comments.


Open the Comment box and enter text, with the option to assign a task to someone.

Email collaborators

Excel:
Send as Attachment

Sheets:
Email collaborators

Send as attachment so everyone gets a copy to review.

Excel 2013


Save and send options in 2010 version.

Excel 2010

To follow up on a conversation that’s too long for comments, email collaborators right from Sheets.

  1. Click Fileand thenEmail collaborators.
  2. (Optional) To remove a collaborator from the email, uncheck the box next to their name.
  3. Add a subject and message.
  4. (Optional) To send a copy of the email to yourself, check the Send a copy box.
  5. Click Send.
Select File, Email collaborators, then a Send message window appears, with collaborators listed on the right.


Switch to an earlier version or name a version

If you own the spreadsheet or have edit access to it, you can see past versions and restore them.

Sheets: See versions or restore a version:

  1. Select Fileand thenVersion historyand thenSee version history.
  2. (Optional) To see only named versions in the list, click Only show named versions.
  3. Click a timestamp to see a previous version of the file.

    Below the timestamp, you’ll see:
    • The names of anyone who edited the document.
    • A color next to each person’s name. The edits they made appear in that color.
  4. (Optional) To make the version the active version, click Restore this version.
Version history includes the date and time.


Name a version:

  1. Select Fileand thenVersion historyand thenName current version.
  2. Enter a name and click Save.

Create filters and filter views

Excel:
Filters data

Sheets:
Filters and filter views


Advanced filter options in 2013 version.

Excel 2013
 

Advanced options under Filter in 2010 version.

Excel 2010

To filter out data in a spreadsheet, create a filter. If you want filters that don’t affect anyone else’s view, create filter views.

Create a filter:

  1. Select a range of cells.
  2. Click Dataand thenCreate a filter.
  3. Go to the top of the range and click Filter  to see the filter options.

Create a filter view:

  1. Click a cell that has data.
  2. Click Dataand thenFilter viewsand thenCreate new filter view.
  3. In a column header, click a list and select the data you want to filter. Or, in the search box, enter text to search for the data you want to filter.
  4. Click OK.
  5. In the Name box, enter a name for your filter view.
  6. Click Dataand thenFilter views to open your filter view anytime.

For more information, see Sort & filter your data and Create, name, and save a filter view.
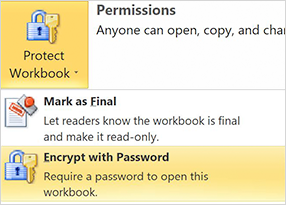
From the menu, find "Create a filter view" by selecting "Filter views" under Data.

Protect content

Excel:
Protect Sheet or Workbook

Sheets:
Protected sheets and ranges

Sheets protected (appear with lock) in 2013  version.

Excel 2013
 

Sheets protected (appear with lock) in 2010  version.

Excel 2010

If you have sensitive content in a spreadsheet, you can restrict people from updating it.

  1. Open the sheet and click Data > Protected sheets and ranges.
  2. Click +Add a sheet or range.
  3. Click Range to protect a range of content or Sheet to protect a whole sheet.
  4. Click Set permissions and choose whether to show a warning or restrict who can edit the content.
  5. Click Done.

For details, see Protect content in a spreadsheet.

Find the option to set permissions by clicking Data, then Protected sheets and ranges.

Limit sharing, downloading, printing, or copying

Excel:
Encrypt with Password

Sheets:
Limit sharing options


Set permissions in 2013 version.

Excel 2013
 

Permissions options in 2010 version.

Excel 2010

If you have sensitive content in a spreadsheet, you can prevent people from downloading, printing, or copying it.

  1. At the top of the spreadsheet, click Share.
  2. At the bottom, click Advanced.
  3. Check the Disable options to download, print, & copy for commenters and viewers box.
  4. Click Done.
Sheet with various settings limited for different people.

Set an expiration date for sharing

Sheets: Set sharing expirations

When you’re working with people outside of your organization, such as clients or agencies, you might want to restrict their access to certain files when your projects are complete.

Set an expiration date:

  1. At the top of the spreadsheet, click Share.
  2. If the file isn’t already shared, share it.
  3. Click Advanced.
  4. Hover over a person’s name and click Set expiration .
  5. Change the access expiration date.

    Note: You can’t set the expiration for the current day. If you need to restrict access immediately, just unshare the file.

  6. Click Save changesand thenDone.

See who's viewed a spreadsheet

Sheets: See who's viewed a spreadsheet

In Sheets, if you have edit access to a spreadsheet, you can see:

  • Who it’s shared with
  • Who viewed it
  • A chart of viewers over time

To see the Activity dashboard, at the top right, click Activity dashboard .

If you don’t want your view history to appear in the Activity dashboard, you can change the privacy settings.

In the Sheets menu, select Data, Filter views, and Create filter.


Want advanced Google Workspace features for your business?

Try Google Workspace today!


Google, Google Workspace, and related marks and logos are trademarks of Google LLC. All other company and product names are trademarks of the companies with which they are associated.

Was this helpful?

How can we improve it?
Search
Clear search
Close search
Main menu
13093847561388481624
true
Search Help Center
true
true
true
false
false